How to Cure Rosin for Maximum Flavor and Quality with Budscure
Curing rosin is the secret to unlocking its full potential. Choosing the right method, like cold or heat curing, ensures you achieve the quality and flavor you desire. Mastering how to cure rosin transforms your concentrate into a true masterpiece.
Wess
12/28/202423 min read
Curing rosin is the secret to unlocking its full potential. When you cure rosin properly, you enhance its flavor, texture, and aroma, creating a more enjoyable experience. This process allows terpenes to shine, giving your rosin a richer and more complex profile. Whether you prefer a smooth, buttery consistency or a bold, shelf-stable product, curing rosin tailors the final result to your liking. Choosing the right method, like cold or heat curing, ensures you achieve the quality and flavor you desire. Mastering how to cure rosin transforms your concentrate into a true masterpiece.
Key Takeaways
Curing rosin enhances its flavor, texture, and aroma, transforming it into a more enjoyable concentrate.
Cold curing preserves terpenes, resulting in a rich flavor profile and a smooth, buttery consistency, while heat curing allows for customizable textures and faster results.
Use airtight glass jars for curing to prevent contamination and maintain the integrity of your rosin.
Monitor temperature closely during curing; for cold curing, keep it between 60°F and 70°F, and for heat curing, stay within 150°F to 200°F.
Whipping the rosin after curing is essential for achieving a uniform texture and even distribution of terpenes.
Experiment with curing times and methods to discover your preferred flavor and texture, whether through cold or heat curing.
Consider using Budscure to simplify the curing process, ensuring precision and consistency for professional-grade results.
What is Rosin Curing and Why Does it Matter?
Definition of Rosin Curing
Rosin curing is the process of refining freshly pressed rosin to enhance its flavor, texture, and overall quality. When you cure rosin, you allow it to develop its full potential by letting the terpenes settle and mature. This step transforms raw rosin into a more stable and enjoyable concentrate. Whether you're aiming for a smooth, buttery consistency or a bold, shelf-stable product, curing plays a key role in achieving your desired results.
Freshly pressed rosin often contains trapped air and moisture, which can affect its texture and flavor. By curing, you eliminate these imperfections and create a more refined product. This process also helps preserve the potency of the rosin, ensuring that you get the most out of your concentrates.
The Role of Curing in Enhancing Flavor and Quality
Curing rosin is essential for unlocking its best qualities. During this process, terpenes—the compounds responsible for aroma and flavor—are preserved and allowed to shine. According to studies, cold curing enhances the flavor and potency of rosin concentrates by protecting these delicate terpenes. This means your cured rosin will not only taste better but also deliver a more potent experience.
Texture is another aspect that curing improves. Over time, the rosin transforms into a more desirable consistency. For example, cold curing can result in a buttery texture that many users prefer. Additionally, curing ensures that your rosin becomes more stable, making it easier to store and handle without losing quality.
Overview of Cold Curing and Heat Curing Methods
There are two main methods for curing rosin: cold curing and heat curing. Each method offers unique benefits and results, allowing you to choose the one that aligns with your preferences.
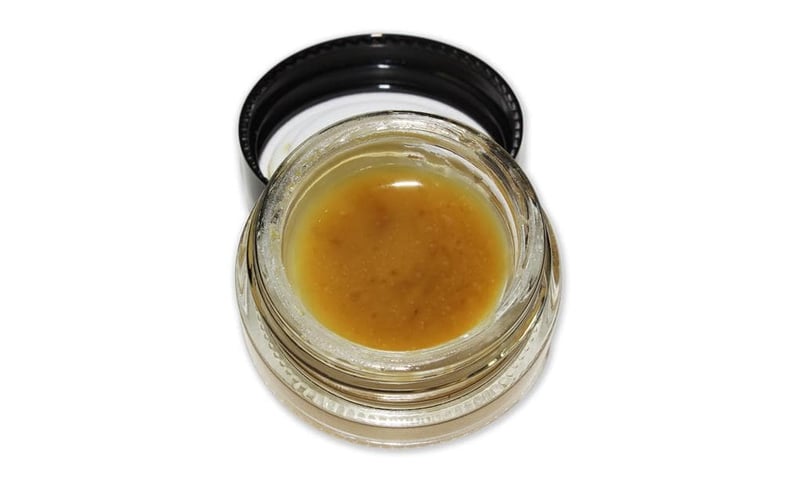
Cold Curing: This method involves storing rosin in a sealed jar at room temperature for a specific period. Cold curing is known for preserving terpenes and enhancing the flavor profile. It also creates a wet, badder-like consistency that many users find appealing. Studies have shown that cold curing helps rosin achieve a buttery texture over time.
Heat Curing: Heat curing requires exposing rosin to controlled heat for several hours or days. This method can be done using an oven or other heat sources. Heat curing alters the texture and flavor, often resulting in a more shelf-stable product. It’s a great option if you’re looking for a firmer consistency or want to experiment with different flavor profiles.
Both methods have their advantages, and the choice depends on your goals. Whether you prioritize flavor, texture, or stability, selecting the right curing method ensures you get the best results from your rosin.
How to Cold Cure Rosin Step-by-Step
What is Cold Curing Rosin?
Cold curing rosin is a method that refines freshly pressed rosin at lower temperatures to enhance its flavor, texture, and overall quality. This process involves storing the rosin in a sealed jar at room temperature or slightly cooler conditions. Over time, the rosin undergoes natural changes, allowing terpenes to settle and mature. These terpenes are responsible for the rich aroma and taste that make your rosin stand out. Cold curing is a simple yet effective way to achieve a smooth, buttery consistency that many users prefer.
Unlike heat curing, cold curing focuses on preserving the delicate compounds in rosin. This method avoids exposing the extract to high temperatures, which can degrade terpenes and alter the flavor profile. By taking a slower, more controlled approach, you can create a concentrate that delivers a superior experience.
Benefits of Cold Curing Rosin
Cold curing offers several advantages that make it a popular choice among rosin enthusiasts:
Enhanced Flavor and Aroma: The cold curing process preserves terpenes, resulting in a more robust and complex flavor profile.
Improved Texture: Cold curing transforms rosin into a wet, badder-like consistency that’s easy to handle and use.
Stability: Properly cold-cured rosin becomes more stable, making it easier to store without losing quality.
Simplicity: This method doesn’t require specialized equipment, making it accessible for beginners and experienced users alike.
By cold curing your rosin, you can elevate its quality and enjoy a product that’s tailored to your preferences.
Step-by-Step Guide to Cold Cure Rosin
Equipment Needed for Cold Curing
To get started with cold curing, you’ll need a few basic tools:
Sealed Glass Jars: Use airtight jars to store the rosin and prevent contamination.
Parchment Paper: For transferring the rosin from the press to the jar.
Refrigerator or Wine Cooler (Optional): For maintaining cooler temperatures if desired.
Whipping Tool: A small tool for mixing and homogenizing the rosin after curing.
These items are easy to find and ensure a smooth cold curing process.
Ideal Temperature and Storage Conditions
The temperature plays a crucial role in cold curing rosin. Room temperature, typically between 60°F and 70°F, works well for this method. If you prefer a slightly cooler environment, you can use a refrigerator or wine cooler set to around 40°F. However, avoid exposing the rosin to extreme cold, as this can affect its consistency.
When using a refrigerator, ensure the jar is sealed tightly to prevent condensation from forming inside. Condensation can introduce moisture, which may compromise the quality of your rosin. After curing, store the rosin at room temperature to maintain its stability.
Duration of Cold Curing for Best Results
The duration of the cold curing process depends on your desired results. For most users, leaving the rosin in a sealed jar at room temperature for 2 to 7 days is sufficient. During this time, you’ll notice changes in the texture and appearance of the rosin. A layer of terpenes may form on top, indicating that the curing process is working.
For a more refined product, you can extend the curing period to a few weeks. Once the rosin reaches your preferred consistency, whip it gently to homogenize the extract. This step ensures an even distribution of terpenes and creates a smooth, buttery texture. After whipping, store the rosin in a cool, dark place to preserve its quality.
Common Mistakes to Avoid When Cold Curing Rosin
Cold curing rosin is a straightforward process, but small missteps can impact the final quality of your product. By understanding and avoiding these common mistakes, you can ensure your rosin achieves the best flavor, texture, and stability.
1. Using Improper Storage Containers
Always use airtight glass jars for the cold curing process. Plastic containers can interact with the rosin, altering its flavor and quality. Glass jars prevent contamination and maintain the integrity of your extract. Ensure the lid seals tightly to keep air and moisture out.
2. Exposing Rosin to Excessive Moisture
Moisture is one of the biggest threats to your rosin during cold curing. Condensation can form if you open the jar too soon after refrigeration or store it in a humid environment. To avoid this, let the jar reach room temperature before opening it. If you’re using a refrigerator, double-check that the jar is sealed properly to prevent condensation from sneaking in.
3. Skipping the Whipping Step
Whipping the rosin after curing is essential for achieving a smooth, consistent texture. Some users skip this step, resulting in uneven distribution of terpenes and an inconsistent product. Use a small whipping tool to gently mix the rosin once the curing process is complete. This step ensures a uniform texture and enhances the overall quality.
4. Rushing the Curing Process
Patience is key when cold curing rosin. Many users make the mistake of cutting the process short, which can leave the rosin underdeveloped. For optimal results, let the rosin cure for at least 2 to 7 days at room temperature or in a refrigerator set to around 40°F. If you’re aiming for a more refined product, extend the curing period to a few weeks. Rushing the process can compromise both flavor and texture.
5. Storing Rosin in Extreme Temperatures
Temperature control is crucial during cold curing. Storing rosin in an environment that’s too hot or too cold can negatively affect its consistency and terpene profile. Room temperature, between 60°F and 70°F, works well for most users. If you prefer cooler conditions, use a wine cooler or refrigerator, but avoid freezing temperatures. Extreme cold can make the rosin brittle and difficult to work with.
6. Neglecting to Monitor the Curing Progress
Failing to check on your rosin during the curing process can lead to missed opportunities for adjustments. Keep an eye on the texture and appearance of the rosin. A layer of terpenes forming on top is a good sign that the curing process is working. If you notice any issues, such as excessive dryness or uneven consistency, address them promptly to avoid further problems.
By steering clear of these common mistakes, you’ll set yourself up for success when cold curing rosin. Paying attention to details like storage, temperature, and timing ensures your rosin reaches its full potential, delivering exceptional flavor and quality every time.
How to Heat Cure Rosin Step-by-Step
What is Heat Curing Rosin?
Heat curing rosin is a method that uses controlled heat to refine freshly pressed rosin. This process involves placing the rosin in a sealed container and exposing it to specific temperatures for a set period. The heat encourages chemical changes within the rosin, enhancing its texture, flavor, and stability. Unlike cold curing, which focuses on preserving terpenes at lower temperatures, heat curing allows you to experiment with different flavor profiles and consistencies.
This method works particularly well with hash rosin, as the heat can bring out unique transformations. For example, heat curing often results in a firmer, more shelf-stable product. If you’re looking to create a concentrate with a bold flavor and a distinct texture, heat curing might be the perfect approach.
Benefits of Heat Curing Rosin
Heat curing offers several advantages that make it a popular choice for many rosin enthusiasts:
Enhanced Stability: Heat curing creates a more shelf-stable product, making it easier to store and handle over time.
Customizable Texture: By adjusting the temperature and duration, you can achieve a variety of textures, from a glassy finish to a waxy consistency.
Unique Flavor Profiles: The heat alters the terpene profile, allowing you to explore new and bold flavors.
Faster Results: Compared to cold curing, heat curing typically takes less time, making it ideal if you want quicker results.
This method gives you the flexibility to tailor your rosin to your preferences, whether you prioritize flavor, texture, or convenience.
Step-by-Step Guide to Heat Cure Rosin
Equipment Needed for Heat Curing
To get started with heat curing, gather the following tools:
Sealed Glass Jars: Use airtight jars to contain the rosin during the curing process.
Oven or Heat Source: A standard oven works well, but you can also use a heat mat or other controlled heat sources.
Thermometer: Monitor the temperature to ensure it stays within the recommended range.
Parchment Paper: For transferring the rosin into the jars without contamination.
These items are easy to find and essential for a successful heat curing process.
Recommended Temperature Ranges for Heat Curing
Temperature plays a critical role in heat curing rosin. For most applications, a range between 150°F and 200°F works best. Lower temperatures, around 150°F, help preserve more terpenes while still refining the rosin. Higher temperatures, closer to 200°F, can create a firmer texture and bolder flavor.
Here’s a quick breakdown:
150°F to 170°F: Ideal for preserving terpenes and achieving a softer consistency.
180°F to 200°F: Great for creating a firmer, more stable product with a unique flavor profile.
Always monitor the temperature closely. Exceeding 200°F can degrade terpenes and cannabinoids, reducing the quality of your rosin.
Monitoring and Adjusting the Heat Curing Process
Once you’ve set up your equipment and chosen the right temperature, follow these steps to monitor and adjust the process:
Prepare the Rosin: Place the freshly pressed rosin into a sealed glass jar. Ensure the jar is clean and airtight to prevent contamination.
Set the Temperature: Preheat your oven or heat source to the desired temperature. Use a thermometer to confirm accuracy.
Begin the Curing Process: Place the sealed jar in the oven or on the heat source. Let it cure for 30 minutes to an hour, depending on your goals.
Check the Progress: After the initial curing period, remove the jar and inspect the rosin. Look for changes in texture and consistency. If needed, return it to the heat for additional time.
Whip the Rosin (Optional): For a smoother texture, use a whipping tool to mix the rosin after curing. This step ensures even distribution of terpenes and creates a uniform product.
Cool and Store: Once the rosin reaches your desired consistency, let it cool to room temperature. Store it in a cool, dark place to maintain its quality.
By carefully monitoring the process, you can make adjustments to achieve the perfect texture and flavor. Heat curing gives you the freedom to experiment and refine your rosin to match your preferences.
Common Mistakes to Avoid When Heat Curing Rosin
Heat curing rosin can elevate your concentrate, but small errors might compromise the final product. By steering clear of these common mistakes, you’ll ensure your rosin achieves the best flavor, texture, and stability.
1. Using Incorrect Temperatures
Temperature control is critical when heat curing. Many users make the mistake of setting the temperature too high, which can degrade terpenes and cannabinoids. Stick to a range between 150°F and 200°F. Lower temperatures preserve terpenes, while higher ones create a firmer texture. Always use a thermometer to monitor the heat source and avoid exceeding 200°F.
2. Skipping the Sealed Jar Step
Some users skip sealing the rosin in a jar before curing. This step is essential for maintaining the integrity of the rosin. Without a sealed container, terpenes may evaporate, leading to a loss of flavor and aroma. Use airtight glass jars to lock in the terpenes and prevent contamination.
3. Rushing the Process
Heat curing requires patience. Many users rush the process by exposing the rosin to high heat for a short time. This approach can result in uneven curing or a burnt flavor. Allow the rosin to cure for at least 30 minutes to an hour, depending on your desired results. If needed, extend the curing time while keeping the temperature steady.
4. Neglecting to Monitor Progress
Failing to check on your rosin during the curing process can lead to missed opportunities for adjustments. Inspect the texture and consistency every 15 to 20 minutes. Look for changes that indicate progress, such as a smoother texture or a more stable appearance. Adjust the temperature or duration if necessary to achieve your preferred results.
5. Overlooking Whipping for Consistency
After heat curing, some users forget to whip the rosin. This step ensures an even distribution of terpenes and creates a uniform texture. Use a small whipping tool to gently mix the rosin once it cools slightly. Skipping this step can leave you with an inconsistent product.
6. Using Improper Equipment
The right tools make all the difference. Using plastic containers instead of glass jars can alter the flavor and quality of your rosin. Plastic may react with the heat, introducing unwanted elements into the concentrate. Stick to glass jars and ensure they are clean and airtight.
7. Experimenting Without a Plan
Heat curing offers room for experimentation, but diving in without a plan can lead to inconsistent results. Decide on your goals before starting. Are you aiming for a firmer texture or a bold flavor? Adjust the temperature and duration accordingly. Keep notes on your process to refine your technique over time.
By avoiding these pitfalls, you’ll master the art of heat curing rosin. Paying attention to details like temperature, equipment, and timing ensures your rosin reaches its full potential, delivering exceptional quality every time.
Cold Cure Rosin vs. Heat Cure Rosin: Which is Better?
When it comes to curing rosin, choosing between cold curing and heat curing depends on your goals. Each method offers unique benefits, and understanding their differences can help you decide which one suits your preferences.
Key Differences Between Cold and Heat Curing
Cold curing and heat curing differ in their approach and results. Cold curing focuses on preserving terpenes and enhancing flavor, while heat curing emphasizes texture and stability.
Cold Curing: This method involves storing rosin in sealed jars at room temperature or slightly cooler conditions. It’s a slower process that allows terpenes to mature naturally. The cold curing process often results in a wet, badder-like consistency with a rich aroma and taste. It’s ideal if you want to preserve the delicate compounds in your rosin.
Heat Curing: Heat curing uses controlled heat to refine rosin. You place the rosin in a sealed jar and expose it to temperatures between 90°F and 200°F. This method works faster and lets you experiment with different textures, from jam-like consistencies to firmer, shelf-stable products. Heat curing also alters the terpene profile, creating bold and unique flavors.
The choice between these methods depends on what you value most—flavor preservation or texture customization.
How Each Method Affects Flavor, Texture, and Quality
Both methods impact the flavor, texture, and overall quality of your rosin in distinct ways.
Flavor: Cold curing excels at preserving terpenes, giving your rosin a more complex and robust flavor profile. Heat curing, on the other hand, can create bolder flavors by altering the terpene composition. Lower heat settings (around 90°F to 130°F) help retain more terpenes, while higher temperatures (up to 200°F) produce stronger, more distinct flavors.
Texture: The cold curing process transforms rosin into a smooth, buttery consistency that’s easy to handle. Heat curing offers more versatility, allowing you to achieve textures ranging from soft and jam-like to firm and glassy. For example, using a heating mat at 100°F can create a jam-like texture, while curing at 200°F in an oven results in a firmer product.
Quality: Both methods enhance the quality of rosin, but in different ways. Cold curing focuses on preserving the natural potency and aroma of the extract. Heat curing improves stability, making the rosin easier to store and handle over time. By carefully monitoring the process, you can ensure high-quality results with either method.
Choosing the Right Method Based on Your Preferences
Your choice between cold curing and heat curing should align with your personal preferences and goals. Here’s how to decide:
If You Prioritize Flavor: Go for cold curing. This method preserves terpenes, resulting in a richer and more aromatic product. It’s perfect if you want to enjoy the full spectrum of flavors in your rosin.
If You Want Custom Textures: Choose heat curing. This method gives you the flexibility to experiment with different consistencies. Whether you prefer a jam-like texture or a firmer, shelf-stable product, heat curing lets you customize the final result.
If You Need Faster Results: Opt for heat curing. It’s quicker than cold curing and allows you to refine your rosin in just a few hours. This makes it a great option if you’re short on time but still want high-quality results.
If You’re New to Curing: Start with cold curing. It’s a simpler process that doesn’t require specialized equipment. You can achieve excellent results with just a sealed jar and room temperature conditions.
Ultimately, both methods have their strengths. Experimenting with cold curing and heat curing can help you discover what works best for your needs. Whether you’re after maximum flavor, unique textures, or quick results, there’s a curing method that’s right for you.
Expert Tips for Rosin Curing Success
How to Preserve Terpenes During Rosin Curing
Preserving terpenes is essential for achieving the best flavor and aroma in your rosin concentrates. These delicate compounds are responsible for the unique scent and taste of your product, so protecting them during the curing process should be a top priority. Here’s how you can ensure terpene preservation:
Control the Temperature: High temperatures can degrade terpenes quickly. For cold curing, stick to room temperature or slightly cooler conditions, around 60°F to 70°F. If you’re heat curing, keep the temperature between 90°F and 120°F to minimize terpene loss. Avoid exceeding 200°F, as this can destroy terpenes and cannabinoids.
Use Airtight Containers: Always store your rosin in sealed glass jars during curing. Airtight containers prevent terpenes from evaporating and protect the rosin from contamination. Glass jars are ideal because they don’t interact with the extract, unlike plastic containers.
Limit Exposure to Air: Oxygen can degrade terpenes over time. Keep the jar sealed tightly throughout the curing process. If you need to check on your rosin, minimize the time the jar stays open.
Start with High-Quality Material: The quality of your starting material directly impacts the terpene content in your final product. Choose cannabis plants rich in trichomes and ensure your extraction process preserves as many terps as possible. Fresh flower rosin works exceptionally well for cold curing, as it retains more terpenes.
By following these steps, you’ll maximize the flavor and aroma of your cured rosin, creating a product that stands out.
Proper Storage and Handling for Cured Rosin
Once your rosin curing process is complete, proper storage and handling are crucial to maintaining its quality. Here’s how you can store and handle your cured rosin effectively:
Choose the Right Storage Environment: Store your cured rosin in a cool, dark place to prevent heat and light from degrading its quality. A temperature range of 60°F to 70°F works well for most rosin concentrates. Avoid exposing the product to direct sunlight or extreme temperatures.
Use Airtight Containers: Keep your rosin in sealed glass jars to maintain its stability and prevent contamination. Airtight containers also help preserve the terpenes, ensuring your rosin retains its rich aroma and flavor.
Avoid Excessive Handling: Handle your rosin with care to avoid introducing contaminants. Use clean tools when transferring or whipping the rosin. Avoid touching it directly with your hands, as oils and dirt can affect its quality.
Monitor Long-Term Storage: If you plan to store rosin for an extended period, consider refrigerating it. Set the refrigerator to a stable temperature, around 40°F, and ensure the jar is sealed tightly to prevent condensation. Let the jar reach room temperature before opening it to avoid moisture buildup.
Proper storage and handling ensure your cured rosin remains fresh, flavorful, and potent for as long as possible.
Troubleshooting Common Issues During Rosin Curing
Even with careful preparation, you might encounter challenges during the rosin curing process. Here’s how to troubleshoot some common issues:
Rosin Feels Too Dry: If your rosin becomes overly dry, it may have lost too much moisture during curing. To fix this, try the jam-tek method. Mix a small amount of jam-like rosin back into the dry batch to restore its wet consistency.
Rosin Has an Uneven Texture: Uneven texture often results from skipping the whipping step. After curing, use a whipping tool to mix the rosin thoroughly. This ensures an even distribution of terpenes and creates a smooth, consistent product.
Condensation Inside the Jar: Condensation can form if the jar isn’t sealed properly or if you open it too soon after refrigeration. Always let the jar reach room temperature before opening it. Ensure the lid is airtight to prevent moisture from entering.
Rosin Lacks Flavor: If your rosin doesn’t have a strong flavor, it might be due to terpene degradation. Check your curing temperature and storage conditions. Stick to lower temperatures for cold curing and avoid exceeding 120°F for heat curing to preserve terpenes.
Rosin Becomes Sticky or Hard to Handle: Sticky rosin can result from improper storage or high humidity. Store your rosin in a cool, dry place and use parchment paper for easier handling. If it becomes too sticky, refrigerate it briefly to firm up the texture.
By addressing these issues promptly, you can ensure your rosin curing process delivers the best possible results every time.
Using Budscure to Simplify and Enhance the Curing Process
Curing rosin can feel like a delicate balancing act. You want to preserve terpenes, refine texture, and enhance flavor without overcomplicating the process. That’s where Budscure steps in. This innovative tool takes the guesswork out of curing, making it easier for you to achieve professional-grade results every time.
Why Choose Budscure for Rosin Curing?
Budscure offers a streamlined approach to curing rosin. It’s designed to simplify the process while ensuring your final product reaches its full potential. Here’s why Budscure stands out:
Precision Control: Budscure helps you maintain the ideal temperature and environment for curing. Whether you’re cold curing or heat curing, it ensures consistent conditions that protect terpenes and cannabinoids.
Time-Saving Features: With Budscure, you can reduce the time spent monitoring your rosin. Its user-friendly design allows you to focus on other tasks while it handles the curing process.
Versatility: Budscure works seamlessly with both cold and heat curing methods. Whether you’re aiming for a buttery texture or a bold flavor profile, it adapts to your needs.
Consistency: Achieving uniform results can be tricky when curing manually. Budscure eliminates inconsistencies, giving you a product that looks, tastes, and feels just right.
How to Use Budscure in Your Curing Process
Using Budscure is straightforward. Follow these steps to incorporate it into your curing routine:
Prepare Your Rosin
Start by extracting high-quality rosin from trichome-rich cannabis. Use fresh flower rosin for cold curing or bubble hash for heat curing. Place the rosin in a sealed glass jar to prevent contamination.Set Up Budscure
Adjust Budscure to match your chosen curing method. For cold curing, set it to maintain room temperature or slightly cooler conditions (around 60°F to 70°F). For heat curing, select a temperature between 90°F and 120°F to preserve terpenes while refining texture.Begin the Curing Process
Place the sealed jar of rosin inside Budscure. Activate the device and let it work its magic. For cold curing, leave the rosin for 2 to 7 days. For heat curing, monitor the progress after 30 minutes to an hour, depending on your desired results.Monitor and Adjust
Check on your rosin periodically. Budscure’s precision controls make it easy to tweak settings if needed. Look for changes in texture, consistency, and terpene separation to gauge progress.Whip and Store
Once the curing process is complete, whip the rosin gently to homogenize the extract. This step ensures even terpene distribution and creates a smooth texture. Store the finished product in a cool, dark place to maintain its quality.
Benefits of Using Budscure
Budscure doesn’t just simplify curing—it elevates the entire process. Here’s what you gain by using this tool:
Enhanced Flavor and Aroma: Budscure’s precise temperature control preserves terpenes, resulting in a richer and more complex flavor profile.
Improved Texture: Whether you prefer a wet badder consistency or a firmer, shelf-stable product, Budscure helps you achieve the perfect texture.
Reduced Errors: By automating key aspects of curing, Budscure minimizes common mistakes like temperature fluctuations or moisture exposure.
Professional Results at Home: With Budscure, you can produce rosin that rivals professional-grade concentrates, all from the comfort of your home.
“Budscure has completely transformed how I cure my rosin. The consistency and flavor are unmatched!” – A satisfied user
Take the Guesswork Out of Curing
Curing rosin doesn’t have to be complicated. Budscure empowers you to create high-quality concentrates with ease. Whether you’re a seasoned pro or just starting out, this tool ensures your rosin curing process is efficient, effective, and enjoyable. Give Budscure a try and experience the difference it makes in your results.
How Budscure Can Help You Cure Rosin Like a Pro
What is Budscure and How Does it Work?
Budscure is a game-changing tool designed to simplify and elevate the art of curing rosin. Whether you're cold curing or heat curing, Budscure provides precision and consistency throughout the curing process. It creates an ideal environment for your rosin, ensuring that terpenes are preserved, potency is maximized, and the final product meets your expectations.
This innovative device works by maintaining controlled conditions tailored to your chosen curing method. For cold curing, Budscure keeps the temperature stable at room levels or slightly cooler, allowing terpenes to mature naturally. For heat curing, it offers precise temperature settings, letting you experiment with textures like jam, sauce, or even diamonds. With Budscure, you can achieve professional-grade results without the guesswork.
Benefits of Using Budscure for Rosin Curing
Budscure offers several advantages that make it a must-have for anyone looking to cure rosin effectively. Here’s why it stands out:
Precision Temperature Control: Budscure ensures that your rosin curing process happens under optimal conditions. It eliminates the risk of overheating or terpene loss, which is crucial for both cold curing and heat curing.
Enhanced Potency: By preserving terpenes and cannabinoids, Budscure helps you retain the full potency of your rosin concentrates. This means a more flavorful and aromatic product every time.
Versatility: Whether you prefer cold curing for maximum terpene preservation or heat curing for unique textures, Budscure adapts to your needs. It’s perfect for creating everything from buttery badder to shelf-stable concentrates.
Ease of Use: Budscure simplifies the curing process, making it accessible even for beginners. You don’t need to monitor temperatures constantly or worry about environmental factors.
Consistency: Achieving uniform results can be challenging when curing rosin manually. Budscure ensures that every batch turns out just the way you want it, with consistent flavor, texture, and quality.
“Budscure has completely transformed how I cure rosin. The results are always consistent, and the flavors are incredible!” – A satisfied user
Step-by-Step Guide to Using Budscure in Your Curing Process
Using Budscure is straightforward and efficient. Follow these steps to get the most out of this tool:
Prepare Your Rosin
Start by extracting high-quality rosin from fresh flower or bubble hash. Place the freshly pressed rosin into a clean, airtight glass jar. This step prevents contamination and locks in terps for the curing process.Set Up Budscure
Adjust Budscure to match your preferred curing method. For cold curing, set it to maintain room temperature or slightly cooler conditions (around 60°F to 70°F). For heat curing, choose a temperature between 90°F and 120°F to preserve terpenes while refining texture.Begin the Curing Process
Place the sealed jar of rosin inside Budscure. Activate the device and let it work its magic. For cold curing, leave the rosin for 2 to 7 days. For heat curing, monitor the progress after 30 minutes to an hour, depending on your desired results.Monitor Progress
Check on your rosin periodically. Budscure’s precision controls make it easy to tweak settings if needed. Look for changes in texture, consistency, and terpene separation to gauge progress.Whip and Store
Once the curing process is complete, whip the rosin gently to homogenize the extract. This step ensures even terpene distribution and creates a smooth texture. Store the finished product in a cool, dark place to maintain its quality.
By following these steps, you’ll unlock the full potential of your rosin with minimal effort. Budscure takes the complexity out of curing rosin, allowing you to focus on enjoying the results.
Curing rosin is the key to unlocking its full potential. By refining its flavor, texture, and quality, you elevate your experience with every use. Cold curing preserves terpenes, delivering a rich aroma and buttery consistency, while heat curing offers bold flavors and customizable textures. Experimenting with both methods helps you discover what suits your preferences best. To simplify the process and achieve consistent results, Budscure provides the precision and control you need. With Budscure, creating high-quality cured rosin becomes effortless, ensuring every batch meets your expectations.
FAQ
What is the best starting material for curing rosin?
The quality of your starting material plays a huge role in the final product. For the best results, use freshly pressed rosin made from high-quality cannabis. Flower rosin and solventless hash rosin are excellent choices because they retain more terpenes and cannabinoids. If you're aiming for premium hash rosin, ensure your material is rich in trichomes and free from contaminants.
How long should I cure rosin for optimal results?
The curing time depends on your preferred rosin curing technique. For cold curing, you can cure for 1-2 weeks to achieve a smooth, buttery texture and enhanced flavor. Heat curing, or hot curing rosin, typically takes 30 minutes to a few hours, depending on the temperature and desired consistency. Experiment with curing times to find what works best for your needs.
Can I preserve terpenes while curing rosin?
Yes, preserving terpenes is crucial for maintaining flavor and aroma. To protect terpenes, control the temperature during curing. For cold curing, keep the rosin at room temperature or slightly cooler. For heat curing, stay within 90°F to 120°F. Using airtight glass jars also helps with curing and terpene preservation by preventing evaporation and contamination.
What equipment do I need for curing rosin?
You don’t need much to get started. For cold curing, you’ll need airtight glass jars, parchment paper, and a clean workspace. Heat curing requires an oven or heat source, a thermometer, and sealed jars. If you want to simplify the process, consider using Budscure, which provides precision and consistency for both cold and heat curing methods.
Why does my rosin feel too sticky or dry after curing?
Sticky or dry rosin often results from improper storage or curing conditions. If it feels too sticky, refrigerate it briefly to firm up the texture. For dryness, try the rosin jam technique by mixing a small amount of jam-like rosin back into the batch. Always store your rosin in a cool, dark place to maintain its ideal consistency.
Can I whip rosin during the curing process?
Yes, whipping rosin is a great way to create a uniform texture and distribute terpenes evenly. After curing, use a whipping tool to mix the rosin gently. This step is especially helpful for achieving a smooth, buttery consistency in freshly pressed rosin or flower rosin.
What’s the difference between cold curing and heat curing?
Cold curing focuses on preserving terpenes and enhancing flavor, while heat curing allows for faster results and customizable textures. Cold curing creates a wet, badder-like consistency, while heat curing can produce firmer, shelf-stable products. Your preferred rosin curing technique depends on whether you prioritize flavor or texture.
How do I avoid moisture issues during curing?
Moisture can ruin your rosin by introducing contaminants or altering its texture. Always use airtight glass jars to prevent condensation. If you’re refrigerating rosin, let the jar reach room temperature before opening it. Monitoring humidity levels is another important step to ensure your rosin stays stable.
Can I use Budscure for both cold and heat curing?
Absolutely! Budscure is designed to work seamlessly with both methods. It maintains precise temperature control for cold curing and offers adjustable heat settings for hot curing rosin. Whether you’re creating a buttery texture or experimenting with rosin curing techniques, Budscure simplifies the process and ensures consistent results.
Is it possible to experiment with curing times and temperatures?
Yes, experimenting is key to finding your ideal results. For cold curing, try different durations, such as curing for 1-2 weeks or extending it further for a more refined product. For heat curing, adjust the temperature within the recommended range (90°F to 200°F) to explore unique textures and flavors. Keep notes on your process to refine your technique over time.